I will be honest with you (well I am usually an honest person), but I need to come clean with all of you. I use flash in over 90% of my outdoor portraits! There I have said it – I have put it out there for all to know. And yes, I teach an outdoor natural light portrait class monthly. What can I say? To tell you the truth again, I don’t always get to pick my locations or time, and I like to control my light. I love natural light shots (I swear I do!), and what I am about to tell you are some of the best tips for getting the most out of your Outdoor Portraits when you have control of the situation!
Tip #1
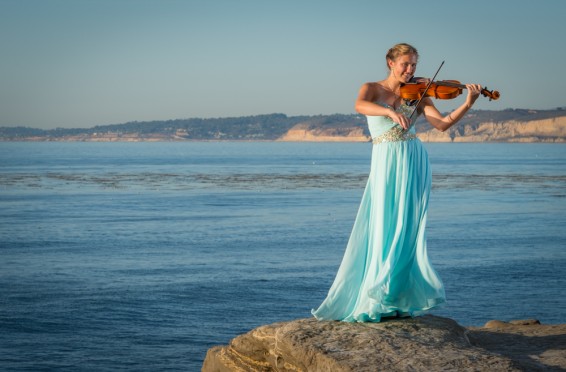
Control the TIME you take portraits! There are really two very specific times of day where the light is the most pleasing for our subjects. These times are known as the "Golden Hours." The light at these times of day is quite soft as compared to other times and has a golden hue. The best times to shoot are from sunrise and two hours after and two hours before the sun sets. The sun at these times of day are traveling through a great deal of atmosphere and the debris in the air, and the moisture helps to make the sun become a very pleasing warm light source. Here’s an example of one of our models during our Portrait Class recently.
Control the TIME you take portraits! There are really two very specific times of day where the light is the most pleasing for our subjects. These times are known as the "Golden Hours." The light at these times of day is quite soft as compared to other times and has a golden hue. The best times to shoot are from sunrise and two hours after and two hours before the sun sets. The sun at these times of day are traveling through a great deal of atmosphere and the debris in the air, and the moisture helps to make the sun become a very pleasing warm light source. Here’s an example of one of our models during our Portrait Class recently.
Tip #2
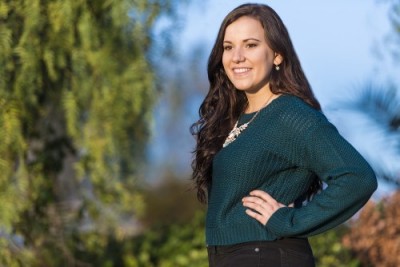
What should you do if you can't control the time, you ask? Well now we have to start getting a little crafty about our image making and the best thing to do in this situation is to find OPEN SHADE. Open shade is really just shade created by a large tree, or large hedge. It can even be within the overhang of a building or portico. Finding open shade allows you to have a soft diffused light coming in from the open sky in front of your subject. Be sure to have them stand just inside the shade line and be careful to watch for dappled light that may appear as bright highlights in your photos. These can be distracting! In the photo below, we used a tree to create soft diffused light by placing our subject underneath it.
What should you do if you can't control the time, you ask? Well now we have to start getting a little crafty about our image making and the best thing to do in this situation is to find OPEN SHADE. Open shade is really just shade created by a large tree, or large hedge. It can even be within the overhang of a building or portico. Finding open shade allows you to have a soft diffused light coming in from the open sky in front of your subject. Be sure to have them stand just inside the shade line and be careful to watch for dappled light that may appear as bright highlights in your photos. These can be distracting! In the photo below, we used a tree to create soft diffused light by placing our subject underneath it.
Tip # 3
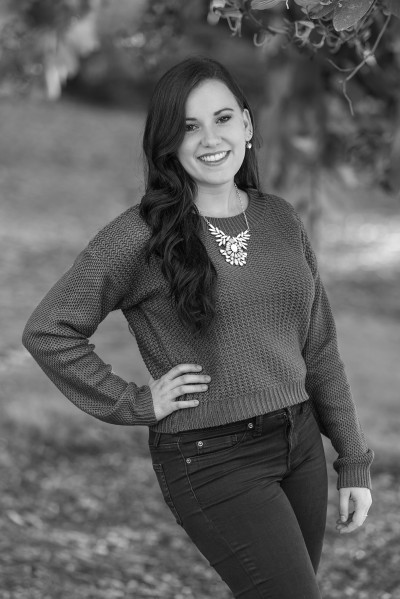
Portraits are best done at wide-open apertures like f/2.8. A wide open aperture helps to throw background elements out of focus, thereby helping to reduce distractions that may cause your viewer to look away from your intended subject. I recommend that you don’t shoot that wide open if you can. Sometimes it’s important to have a sense of place and environment. Using an aperture of f/4 or f/5.6 may actually be more pleasing overall, and help you reduce the amount of sun that may be overexposing parts of your framed elements. The out of focus elements in a photograph can also be achieved by placing your subject further away from the background and using a telephoto lens to take the photograph. In the photo below, we can see the environment, and it’s quite pleasing at f.5.6.
Portraits are best done at wide-open apertures like f/2.8. A wide open aperture helps to throw background elements out of focus, thereby helping to reduce distractions that may cause your viewer to look away from your intended subject. I recommend that you don’t shoot that wide open if you can. Sometimes it’s important to have a sense of place and environment. Using an aperture of f/4 or f/5.6 may actually be more pleasing overall, and help you reduce the amount of sun that may be overexposing parts of your framed elements. The out of focus elements in a photograph can also be achieved by placing your subject further away from the background and using a telephoto lens to take the photograph. In the photo below, we can see the environment, and it’s quite pleasing at f.5.6.

Tip #4
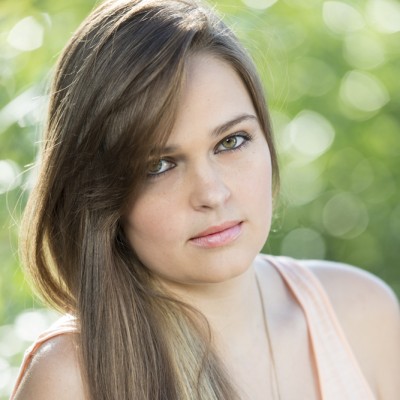
I am sure most of you have heard the expression, “It’s all in the eyes!” Well it’s 100% absolutely true. It IS all in the eyes! Many expressions can be discerned just by looking at the eyes; sadness, happiness, and laughter are all quite visible by just looking at the eyes. So, if this is true, where do you think your focus point should be? Yep, you got it, the EYES! When capturing a portrait, I also use the Single Autofocus Focus Point, and as I frame my shot I move that focal point to the closest eye to the camera. This way the closest eye will always appear in focus and will be easy for my viewers to focus in on what’s important. Also, a little side tip about eyes: have you ever heard of the expression "dead eyes”? This is when, in a photograph, the subject doesn’t have any specular highlights in the eyes. We call these "catch lights", and you really want these in your subjects eyes. It gives your subject's eyes life and radiates youth and vitality. If you want a visual to keep in mind, Google “Dora the Explorer” and look at her cartoon image. You’ll see what I mean immediately, and you will never forget! The most common way to add catch lights to the eye when photographing someone is to place your subject near large brightly lit objects. For example, in one setting on a sidewalk downtown, we used a shaded area right next to the street to capture some nice midday portraits. The catch lights were provided by a sunlit white jeep in front of our subject! Below is an example of how much power can be shown in the eyes of your subject.
I am sure most of you have heard the expression, “It’s all in the eyes!” Well it’s 100% absolutely true. It IS all in the eyes! Many expressions can be discerned just by looking at the eyes; sadness, happiness, and laughter are all quite visible by just looking at the eyes. So, if this is true, where do you think your focus point should be? Yep, you got it, the EYES! When capturing a portrait, I also use the Single Autofocus Focus Point, and as I frame my shot I move that focal point to the closest eye to the camera. This way the closest eye will always appear in focus and will be easy for my viewers to focus in on what’s important. Also, a little side tip about eyes: have you ever heard of the expression "dead eyes”? This is when, in a photograph, the subject doesn’t have any specular highlights in the eyes. We call these "catch lights", and you really want these in your subjects eyes. It gives your subject's eyes life and radiates youth and vitality. If you want a visual to keep in mind, Google “Dora the Explorer” and look at her cartoon image. You’ll see what I mean immediately, and you will never forget! The most common way to add catch lights to the eye when photographing someone is to place your subject near large brightly lit objects. For example, in one setting on a sidewalk downtown, we used a shaded area right next to the street to capture some nice midday portraits. The catch lights were provided by a sunlit white jeep in front of our subject! Below is an example of how much power can be shown in the eyes of your subject.
Tip #5
I learned this along the way from several different photographers, but this was mostly ingrained in my head watching a tutorial from famous Atlanta, GA based commercial and portrait photographer Zach Arias. He kept saying the same thing throughout the tutorial and it became ingrained in my conscious; it is: “Head in a clean spot!” You’d be surprised at how often we look at a picture and say to ourselves 'Great, that looks good!' and move on, only to come back to the same photo later and notice the street lamp pole sticking out of the subject's head. This doesn’t just apply to the head, you should be reviewing your frame all around your subject. I have had a great shoot and walked away feeling the most confident that everyone would love them, only to have to Photoshop out the trash can in 10 different images to clean them up. So be aware of your surroundings, and be sure to look for a clean spot for your subjects to sit comfortably in and to create less work for yourself. Here’s a good example of what NOT to do:
I learned this along the way from several different photographers, but this was mostly ingrained in my head watching a tutorial from famous Atlanta, GA based commercial and portrait photographer Zach Arias. He kept saying the same thing throughout the tutorial and it became ingrained in my conscious; it is: “Head in a clean spot!” You’d be surprised at how often we look at a picture and say to ourselves 'Great, that looks good!' and move on, only to come back to the same photo later and notice the street lamp pole sticking out of the subject's head. This doesn’t just apply to the head, you should be reviewing your frame all around your subject. I have had a great shoot and walked away feeling the most confident that everyone would love them, only to have to Photoshop out the trash can in 10 different images to clean them up. So be aware of your surroundings, and be sure to look for a clean spot for your subjects to sit comfortably in and to create less work for yourself. Here’s a good example of what NOT to do:
Bonus Tip
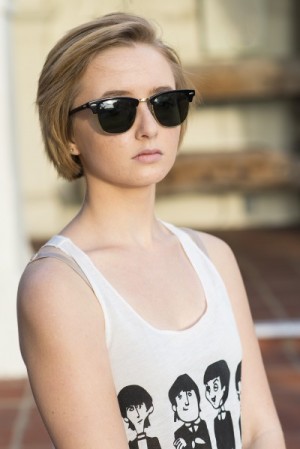
OK, this is fun telling you all these little tips, so here’s one more most people don't think of! If your subject has dark hair, photograph them on a light background. If your subject has light hair, photograph them on a darker background. In both instances, you will have helped to make your subject pop more in the image! Similar in thought is using the color wheel; for example, red clothes on a cyan background. So get out there and give some of these tips a try!
If you want to learn more, please join the upcoming Create Great Portraits Outdoors photography class! Here, you will have an expert instructor on site to answer any questions you may face throughout the event. How to properly communicate with your model, maximize your available light, as well as product recommendations aimed at saving you money will be discussed! Click here to learn more about this course and sign up today!


