I am a high School Senior Portrait photographer, and I really love this niche. The
Seniors are energetic and always willing to try new things and experiment. We do the normal shots as well and love them just as much, however. One of the most important rules I have learned in Portrait photography is “Head in a clean spot!” This saying has of course been around for some time, but it really wasn’t drilled into my head until I watched a lighting tutorial from a famous Atlanta photographer, Zach Arias. “Head in a clean spot,” he’d say over and over throughout his shooting session. In fact, in one scene he purposely went behind the subject and moved a picture frame off the wall to achieve the “Head in clean spot.”
Of course we all know this is true, I mean how many photographs have you seen where someone has a branch of a tree or a mailbox sticking out of the side of their
head? These are not very pleasing photographs. And as photographers, we should always strive to get it all correct in camera. We should get the exposure correct, the crop correct, the composition correct, white balance correct, and of course head in a clean spot. Sometimes, try as we might, we may not get it all done correctly – but we should at least try! In those cases, we may have to pull out the editing software and make a couple of tweaks to help improve the image. And with this in mind I want to share
one of my favorite Photoshop tools - The Patch Tool.
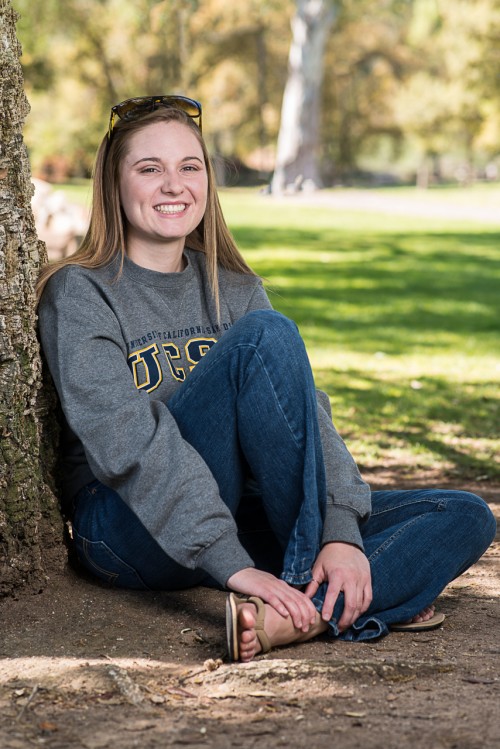
In the photograph below, Rebekah wanted to have a College feel to the photo, while she was wearing her new school sweatshirt to show where she was headed. We went to the local community college and positioned her under the tree with the campus in the background. All in all, the shot achieved the desired result for her, but there were just a few things that weren’t quite right to me. See the photograph below:
In the photograph below, Rebekah wanted to have a College feel to the photo, while she was wearing her new school sweatshirt to show where she was headed. We went to the local community college and positioned her under the tree with the campus in the background. All in all, the shot achieved the desired result for her, but there were just a few things that weren’t quite right to me. See the photograph below:

In this photograph, there are 5 things wrong with it. Can you see what’s bugging me the most? Here’s what I see:
1) My 26” Westcott Octabox is peeking into the shot at the upper right corner.
2) There’s a light pole growing out of Rebekah’s head.
3) To the left of the large tree there is a white orb at the top of the light pole.
4)And while where at it, there's another distracting white orb to the right of the large tree.
5) Lastly, there is a garbage can right in front of the large tree in the background.
As you can see, I didn’t quite achieve “Head in a clean spot”, and I also left some other non-essential details in the shot. So here’s where I quickly pull the image into Adobe Photoshop (CS6) and do a little tweaking with the Patch Tool.
The Patch Tool is part of the Spot Healing brush tools in Photoshop. When Content Aware was added to Photoshop in CS5, the Spot healing tools became almost magical because they could help remove unwanted items from your photographs. The patch tool is really quite simple to use. Select the tool from the Spot Healing Pallet, which can be accessed using the letter “J” as a hot key. Once you have selected the tool use your mouse or Wacom Pen (as I do) and draw a selection around the object you would like to remove. Once the item is selected, you can then take your mouse or pen and drag the unwanted selection over a selection that best fits the area you want to replace it with.
You can watch a sequence of events depicting what I just described in a short video here!

As you can see from the final image, the background is a little more pleasing, and our subject fits better in the open campus.
I hope this quick little tutorial helps you! Try to get it right in camera, and we all know we’re going to miss it now and then, but there are some tools that can help us tell a better story. Don’t forget to check out the Headshot/Portraiture class and the Photoshop class here on Local Photo Classes to learn more!


