


Creating a silhouette in an image is easier said than done. If you, like many others, have attempted this style of photography and put down your camera in frustration instead, then this post is for you! Silhouette photography is perfect for a wedding, portrait, or family event and gives your client a unique image that they can cherish forever. Having a mastery of this type of shot shows your clients that you are diverse in your skills and can offer different styles of images for them to choose from. We will discuss the 3 types of silhouettes- perfect, partial, and contrasting so that you can recreate this unique style of photography for yourself!
How to Capture a Perfect Silhouette
A perfect silhouette is an image that has your subject completely dark and your background exposed, thus creating a perfect silhouette. For example, this perfect silhouette was captured indoors with the window being used as the light source for the photograph. By using the window light and exposing the background, the foreground becomes dark, creating a perfect silhouette.
Here are the camera settings for this photo:
- exposure time: 1/800
- f/stop: 2.8
- focal length: 120

How To Capture a Partial Silhouette
A partial silhouette can be created by lighting one side of your subject’s face, leaving the other half darkened. In the above photograph, the subject was indoors and placed next to the window in order to begin creating this silhouette. The flash was bounced off the window light, creating half a silhouette across the subject’s face.
These are the settings that were used to create the above image:
- exposure time: 1/80
- f/stop: 2.8
- focal length: 105

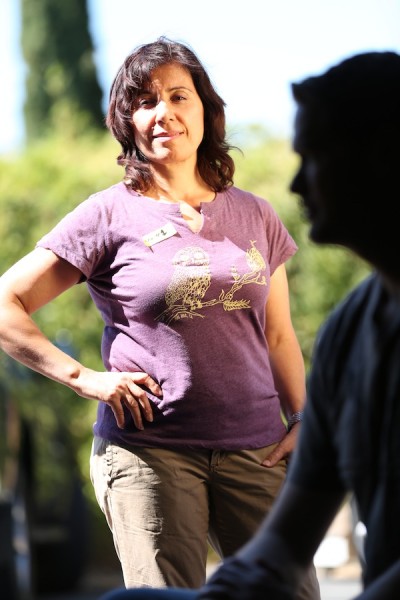
How To Capture a Contrasting Silhouette
A contrasting silhouette must have 2 subjects in order to capture this style of silhouette. This image was created by having the first subject inside the building and in the foreground of the photograph. The second subject was placed outside on the other side of the window, with the sun and a light reflector being used to properly expose the second subject. By exposing the background, the foreground becomes dark, and a contrasting silhouette is created.
Below are the settings that achieved this image:
- exposure time: 1/400
- f/stop: 2.8
- focal length: 142
The topic of silhouette photography was a challenge completed by wedding photographer Julie Fernaue from our Learn-a-thon event.The Learn-a-thon was a great meeting of photographers, from strictly smartphone photographers to professionals. We learned, laughed, and took pictures, all with a great sense of community and excitement in the air. We will be posting more challenges just like this from the event so that you at home can learn some of the topics that were discussed. Bummed you missed the event? Click here to stay informed of all the upcoming free events!